Article Content
| Overview |
| User Account Requirements |
| Related Setup/Information |
| Navigation |
| Adding a Configurable Language Translation |
Overview
Configurable language translations can be uploaded into Resolver to customize the system language. These languages allow you to translate configurable fields and user interface text throughout Resolver.
When you add a language on the Languages screen, Resolver provides a downloadable .csv file that contains the relevant user interface labels and configurable fields. You can enter your translated text directly into the file and then upload the completed .csv back into Resolver to apply the translations.
User Account Requirements
The user account you use to log into Resolver must have Administrator permission or Settings Management advance permissions to access the Languages screen and add a new language or download a language .csv file.
Related Setup/Information
Please see the Languages Overview article for further information regarding configurable languages, including which languages are included in the Configurable Languages section.
Navigation
- From the Home screen, click the Administration icon.
Administration Icon
- From the Administrator Settings menu, click the Languages link.
Languages Link
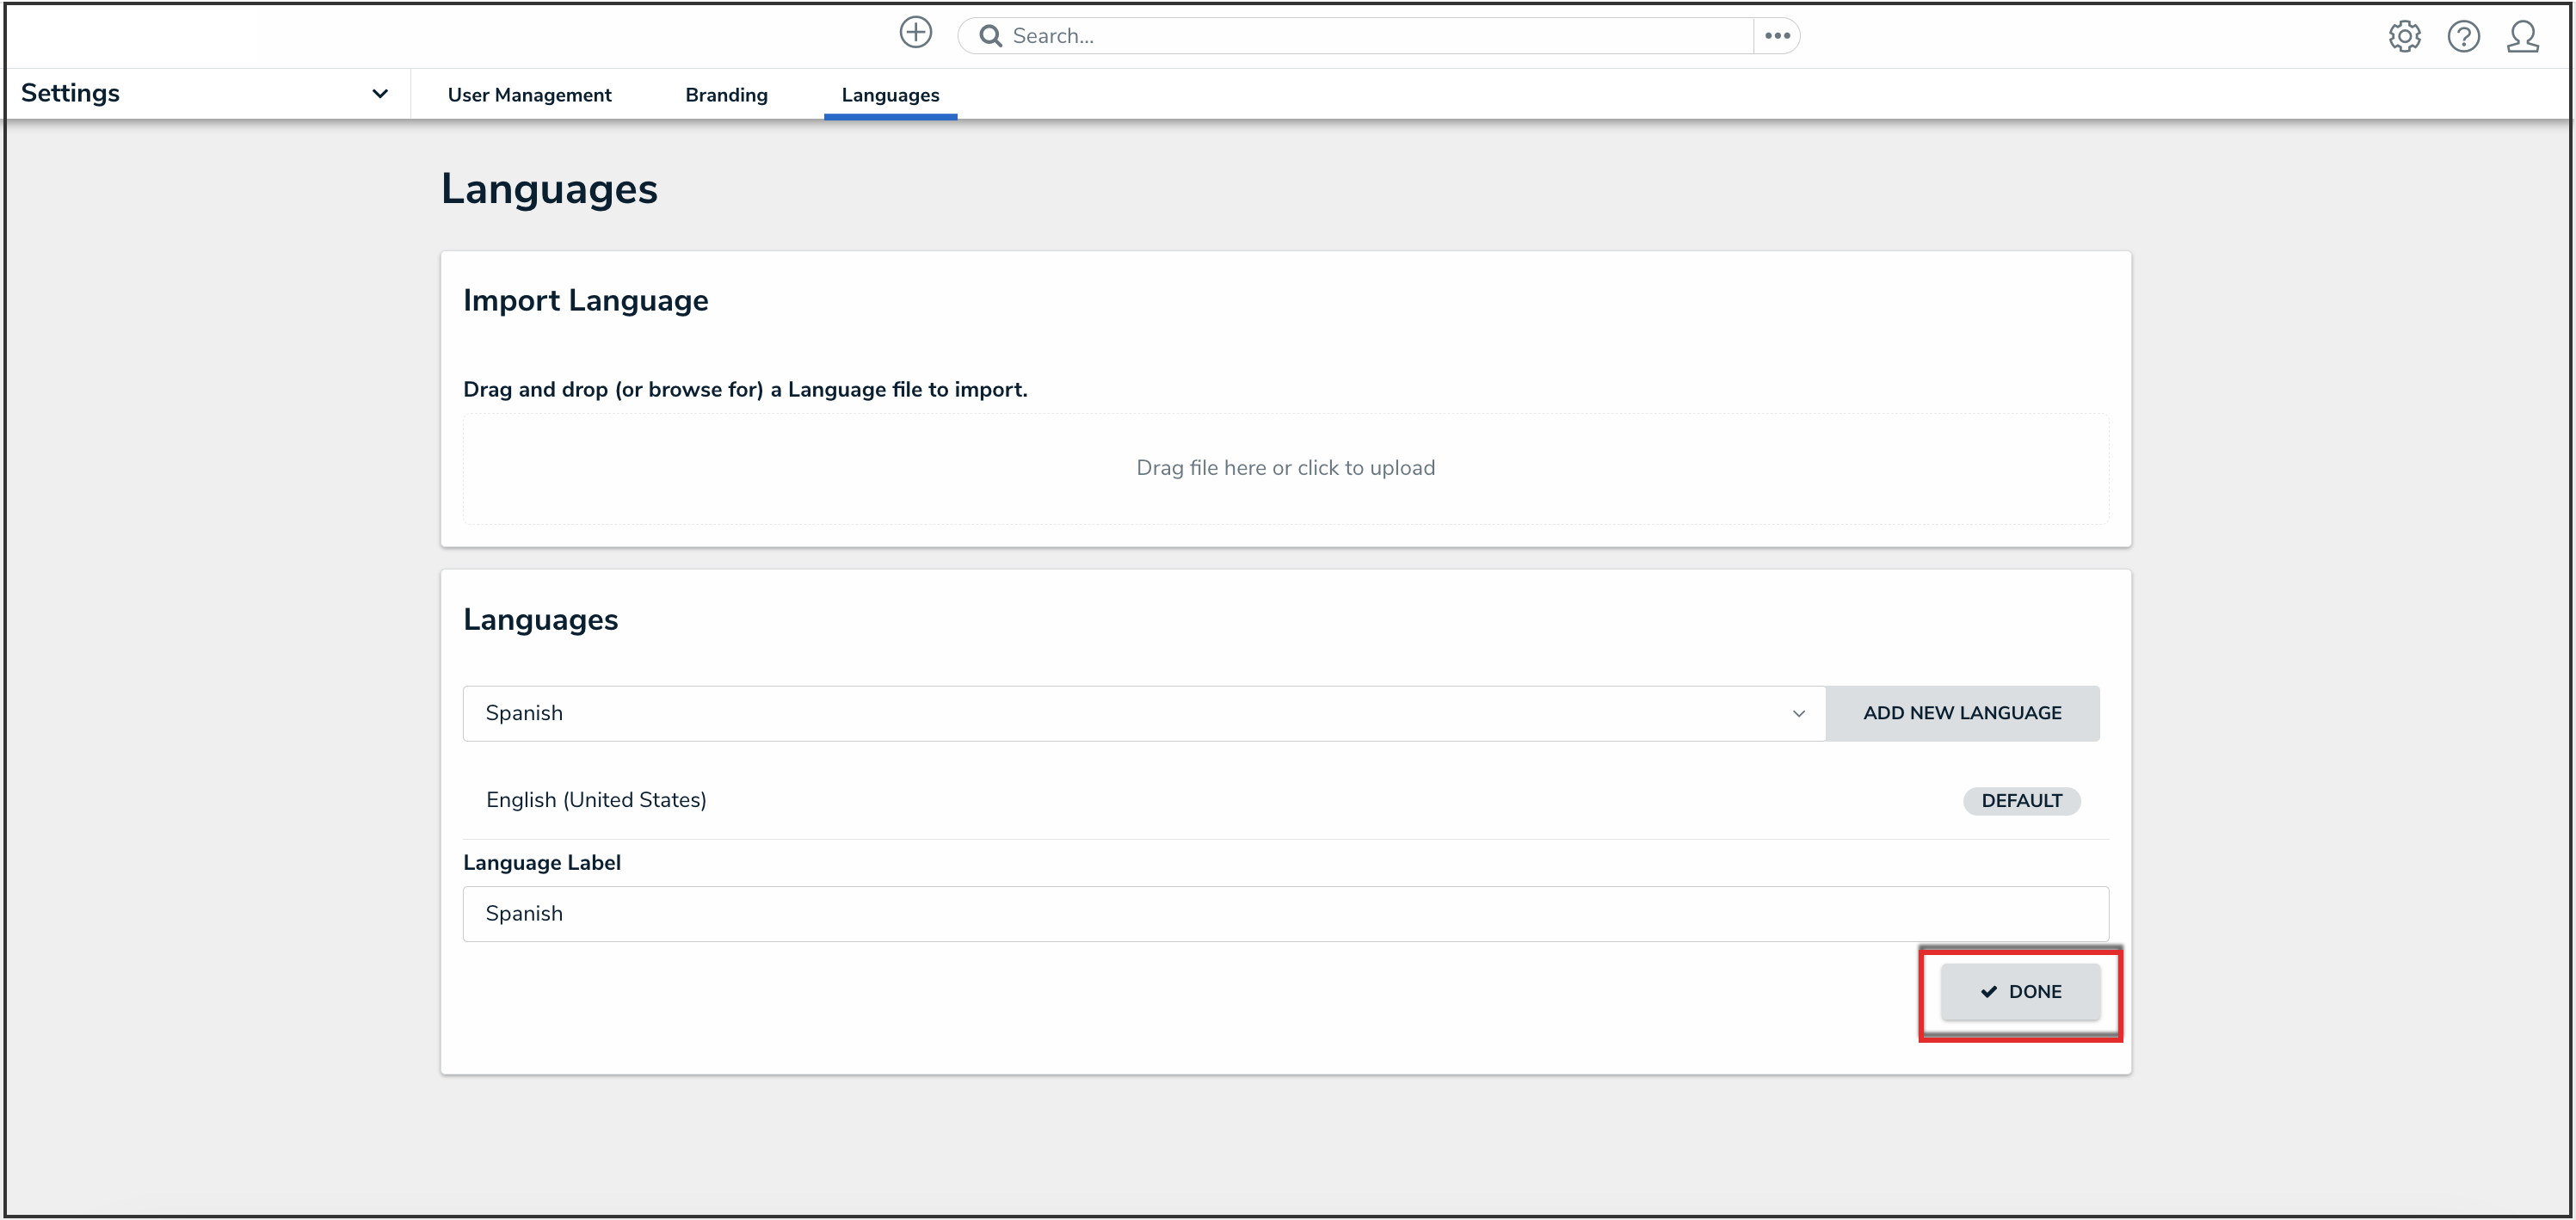
Adding a Configurable Language Translation
- From the Languages screen, click the Add New Language field and select a language from the dropdown menu.

Add New Language Field
- Click the Add New Language button to add the language to the list of available configurable languages.

Add New Language Button
- (Optional): To edit a language label, click the Edit icon and enter a new language label in the Language Label field.

Edit Icon
- Click the Done button to save changes.
Done Button
- Click the Download icon next to a language to download the .csv language spreadsheet.

Download Icon
- The .csv language spreadsheet will download to the connected PC's Download folder.
- Navigate to the Download folder and click the Internationalization_Export_[date]_[language code].csv file.
- From the Platform tab, filter the Language column (last column F) by empty cells, indicating new content.
Language Column
- Enter the translations for column E (US English Default) into column F.
|
Note: Content in the spreadsheet inside curly brackets is dynamic and should not be translated. If a translation is entered between the curly brackets, that translation will overwrite any dynamic text. |
- Save your changes on the spreadsheet in an easily accessible location.
|
Warning: Do not remove any data from the Key column (column D) on the Applications tab worksheet. Removing data from this column will cause an error when uploading the spreadsheet. |
- Navigate back to the Languages screen and drag and drop the .csv language spreadsheet into the designated area or click the designed area and select the .csv language spreadsheet from the connected PC.

Import Language
- A system-generated message will appear if the .csv language spreadsheet is successfully uploaded.